It's time again. It's Monday (for all those people who are working!) which means it's time for Monday Made It!
Last summer and this summer the teacher toolbox has been all over Pinterest and blogs. Sometimes, I'm a little stubborn and cynical. It's true. I was anti teacher toolbox. I refused to jump on the bandwagon. I didn't want to be a follower. Don't get me wrong, they were super cute and I could totally see the value of having all of that organization. But I never did it. THEN I moved to my new school and my new room is going to be...well...let's just say...the size of a closet. But, the new school is totally worth a small room! So, with the small room I was going to have to eliminateclutter valuable teaching supplies and work on my organization. With that said, I have a large collection of math manipulatives that were stored in plastic containers. These lived on a shelf and the students used them daily. Sadly, there won't be shelves for these resources to live on so...here's my solution!
![]()
![]()
![]()
![]()
![]()
![]()
![]()
![]()
![]()
![]()
Last summer and this summer the teacher toolbox has been all over Pinterest and blogs. Sometimes, I'm a little stubborn and cynical. It's true. I was anti teacher toolbox. I refused to jump on the bandwagon. I didn't want to be a follower. Don't get me wrong, they were super cute and I could totally see the value of having all of that organization. But I never did it. THEN I moved to my new school and my new room is going to be...well...let's just say...the size of a closet. But, the new school is totally worth a small room! So, with the small room I was going to have to eliminate
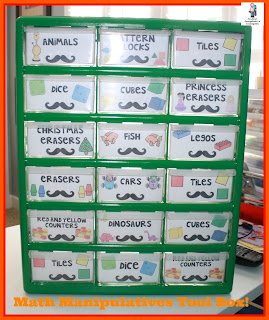
It's my Math Manipulatives Tool Box!!!

For this project you need:
A plastic organizer. I found mine at Lowe's in the hardware aisle. There are many variations of this type of toolbox. I bought the one with the larger drawers.
Spray paint and primer. Make sure to get spray primer for plastic.
Labels. I found my label template here! These are from Fun In Room 4B and they're FREE!
To make a toolbox:

1. Remove all the drawers.
2. Spray with a coat of primer and allow to dry.
3. Paint. I chose green to match my mustache classroom decor set!
4. Download labels and edit them for your manipulatives or supplies.

5. Cut the labels. They should fit nicely in the drawers.
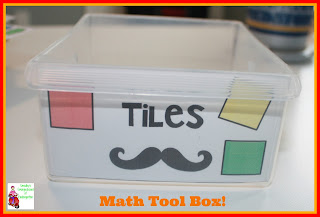
6. I used plain Scotch tape to stick my labels in.
This was a VERY simple project that didn't take long at all!
I will be using this to store manipulatives that my students use. In each drawer there will be 20 or so of the manipulatives. The students will be able to take the drawer to their table or work area and use them for their math centers. When finished they can return the drawer to the toolbox!

Be sure to head over to 4th Grade Folics and link up and check out all of the great ideas!

In case you missed this freebie yesterday, check it out!
This is a great letter recognition freebie that will be great for small groups and RTI!

Click the picture to download!
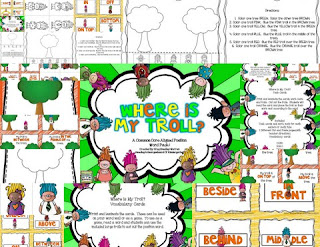
And here is my newest Common Core creation for position words!